Case studies
Mr Howat
This stair was a child of its time, a 26 year old timber structure which had been installed with a treacly dark brown varnish finish (including runs) which was a functional but rather depressing welcome to the house immediately you walked through the front door. In a fit of misplaced enthusiasm around eight years ago, I took days attempting to strip the varnish from the turned newel posts, spindles, base and handrails and stringers. Three different processes were needed to flatten the varnish, kill its colour and undercoat it ready for two coats of white eggshell. However, that transformed its appearance and gave the impression of more light in the hall stairs and landing. The time had come for a further refresh and that had to mean not just the entire staircase, but also all skirtings, architraves and seven panelled doors which led off both levels. We discovered StairFurb and the answer was provided to us. Well, I say that, but the other repainting still was required and seemed to take forever – but it was a good use of time while the embedded kit was being manufactured.
Our intention had been to retain the existing white painted newel posts but the more we thought about it, the more we knew that we would be cheating ourselves from the major transformation which we knew that we wanted. We sourced 90mm square newel posts and started exploring exactly how these could be fitted without destroying the integrity of the existing structure which, after all, had been assembled in a factory before being fitted into the house. We are satisfied that we have conquered that and are delighted with the necessary care which had to be taken to avoid losing strength in the structure. Yes, careful work was needed and I chose to get out the wood auger bits and chisel set to replicate the necessary rebates in the base newel post in order to match the risers and treads of the bottom two steps. The top newel post physically could not be removed, so I drilled out a 50mm diameter cavity and jointed it with a glued and screwed hardwood peg into a new top section, following the helpful advisory video on StairFurb’s site.
The professionalism which we received while working out our needs – Harry was so helpful on video calls and follow-up – extended to the way that David Tombs Couriers handled delivery. Everything was in place with no damage and wonderful protection to all timber parts and glass panels. Nice touches also such as additional oak cut pieces for spacers, a long screwdriver bit and matching screws for the joints between the handrails and newel posts, a template for a dowelled joint for a short return, etc. First task after checking the timber was to choose the finish for the beautiful oak base and handrails. We are pleased that we went for a quality beeswax finish and spent quality time applying three coats on all surfaces. Now it is fitted, it shows that it was the best choice. Taking time before ordering, ensuring that the dimensions were accurate was time well spent and the actual fitting, after pleasurable deconstruction of the old stair components, was careful but very successful. It is not until you remove the existing that you can assess properly whether, for example, the baserail is going to secure to good timber or a void and whether the quadrant beading can be replaced; however in our case, only one additional screw hole was needed to secure everything to our satisfaction. In fact, the new pieces pretty much fell into place and securing them took less time than we expected. The elephant in the room for us – DIY husband and very competent wife – was how to support the loose glass sheets in the baserails while preparing the handrail to drop on top. We needn’t have worried as it all worked and surprisingly, the angled sections on the stair itself proved to be easier to support loosely in place than the landing pieces.
We are delighted and proud of our StairFurb embedded kit and the way in which it has brought our hall, stairs and landing into a new age. Careful measuring, preparation and installation all worked for us and we would like to give our thanks to StairFurb for their design expertise and manufacturing skills. It might not be for everyone to set about fitting the kit without a tradesman but if anything, we are proof that it can be done.
Mr Bennet
Mr & mrs lombard
Mr & Mrs Lombard bought this beautiful farmhouse as a renovation project. They were keen to keep some of the original features and character of the building while giving it a more contemporary and sleek style. The house had fantastic original oak beams and pillars, which the Lombard’s were eager to keep exposed and knew they wanted the balustrade to complement this style if possible.
They opted for the embedded glass kit with oak hand and baserails as well as matching oak newel posts. This was used for the full staircase and this (pictured) fantastic walkway which connects two parts of the house. The customers tested various oils and stains to ensure they got one which would bring the oak to be a close match with the beams they already had.
Mr & Mrs Lombard are over the moon with their new balustrade and feel it really makes gives their home the perfect mix of natural and contemporary style.
The smith family
The Smith family purchased their dream home just over twelve months before they found StairFurb. Having always wanted to live on a nice quiet street, they found their ideal home which was built in 1970 and needed some work done to bring it to the modern ages and give the house the contemporary look the family were dreaming of. Internal walls had been removed to create more space and light in the house, but the staircase remained an issue. They felt that, since the staircase is the first thing people notice when they walk through the front door, they really wanted to make the staircase a feature of the house to make the best first impression. Mrs Smith came across StairFurb on Facebook and when she browsed the website, she knew she had found the right company. Their new glass balustrade staircase was DIY fitted in one afternoons work by Mr Smith and his father without any issues. Needless to say, they are over the moon with their new staircase and feel like it really improves the overall feel of their new home.
The Braybrooke Family
The Braybrooke family are a young couple living with their lively young son. Their home is a 1990’a semi detached house, set back nicely from the road, with a nice big garden and stunning elevated views of the countryside. They wanted to have a contemporary styled home with as much internal light as possible. Having opened up the wall between the kitchen and living room the couple felt is was a shame to have a retro looking and dark staircase. The upper part of the staircase is walled on either side, so in order to bring light into the staircase, the only sensible option was to install a glass panel staircase. Mr Braybrooke found StairFurb on Google while looking for affordable solutions. He ordered and fitted the products on his own, with the help of his wife. Their new StairFurb glass balustrades allow light to flow through the staircase and provides the sleek and contemporary feel to match the rest of their home.
MR FOX
Mr Fox purchased his 1960’s built, detached home only a year ago with the aim of doing a lot of refurbishment work to increase the value of the property. His aim was to create a spacious and stylish feel throughout the house. He renovated the kitchen and all bathrooms and used a lot of oak throughout the refurbishment, including oak flooring and internal doors. He wanted to refurbish his staircase with oak and glass panels but, having had a couple of quotes from other suppliers, was initially put off by the astronomical prices of many of the suppliers. He noticed StairFurb adverts on Facebook and saw some example prices of the StairFurb glass balustrade kits with oak handrails, which were much more affordable than anywhere else he had previously seen. He contacted StairFurb and, after being guided through measuring a quotation process, was amazed by the value for money. He wasn’t confident in doing any DIY, so spoke to his kitchen joiner about doing the fitting for him. He purchased the bespoke kit directly from StairFurb and his kitchen joiner fitted the kit for him in a single day’s work. Mr. Fox is absolutely amazed at the value provided by StairFurb compared to other companies.
HENRY
Henry is a property Developer from Devon. When he and his fiance moved into an old chapel that was built in the early 1800’s they knew they wanted to keep the character of the house while bringing it into the 21st century and giving it a more contemporary and homely feel. There was already a large gallery landing fitted, but it was fitted with pine spindles and shaped newel posts that were all stained a very dark color.
Since they would be painting the skirting boards light grey, Henry and his fiance decided to paint the stringer and newel posts light grey to match the stringer and then fit embedded glass kits with oak baserail and handrail.
Having cut out all of the old spindles, baserail, and handrail, Henry spends one day fitting all the pine spigot newel posts and painting the posts and stringers. The next morning he fitted the oak baserails/handrails and glass.
As guests walk into the house, the gallery landing is the first thing that catches their eye. Needless to say, Henry and his fiance love the way the balustrade adds to the style of their home.
Mr King
Mr King has been living in his home for ten years and bought it from new. He’s decided to invest in refurbishing the house to increate the value of the property. He has had new worktops, kitchen and doors and decided that the staircase needed refreshing as it was rather dark and tired. He had a traesman that had done much of the other work in the house and the tradesman recommended having glass staircase panels installed. Mr King searched around on Pinterest and Facebook and came across StairFurb. He ordered the stainless steel handrails along with bespoke glass panel kit and his tradesman fitted these for him. He’s really impressed with the end result and says that every visitor comments on how stylish the staircase looks as soon as they walk through the front door.
Mr Putwain
Mr Putwain bought his home, which was built in the late 1980’s, twelve months ago and immediately set to work on a complete internal refurbishment. He started with the upstairs and worked his way down. While doing all the work upstairs the staircase got knocked and damaged in a few places, so he decided he wanted to refurbish the staircase and landing. His staircase is rather strange though, in that the handrail runs from the bottom newel post and stops when it meets the ground floor ceiling. He looked about for a supplier that could accommodate this setup, but couldn’t find anyone. He mentioned it to the tradesman that was undertaking much of the work for him and the tradesman found StairFurb. Unlike other suppliers, StairFurb actually has a bespoke setup which works with this kind of “odd shape staircase”. He left it to his tradesman to undertake the required measurements and installation of his new bespoke stainless steel and glass balustrade system. Mr Putwain is in love with his new staircase and says that the landing area compliments the style of the house so much, it’s like a piece of art.
Miss Furzeland
Miss Furzeland moved into her newbuild end terrace home five years ago. The house is dug intot he terrain a bit, so doesn’t allow a huge amount of natural light into the home. She has glass panel doors at the rear of the house, which allows light into the living room nicely, as well as large windows in the front of the house which allow light into the kitchen. Unfortunately this light didn’t flow through the hall way and into the staircase as the spindles would block much of the light. She decided to task her fiancé with sourcing and installing glass staircase panels to allow more light into the stairwell. He was able to place the order, receive delivery, and fit the StairFurb kit within just three weeks of finding StairFurb’s website. The couple are over the moon with their new staircase and it’s spurred them on to take on more DIY refurbishments in their home. They’re soon to fit matching oak laminated flooring, glass panels for their front door and matching oak work surface in the kitchen.
MS STARK
Having purchased her first home, Ms Stark immediately went to work decorating the property in nice light colours in order to get more light to flow through her small semi detached home. As with many small homes the staircase turns back on itself to conserve space. With traditional spindles this layout can really block natural light from getting to the stairwell, so Ms Stark went about searching for ways to brighten up the staircase. She found StairFurb after searching for companies on Google and was immediately drawn towards the style of StairFurb’s brushed stainless steel handrail, which would match many of the fittings (power sockets, door handles etc) throughout the house. She ordered the kit and found a local handyman from trustedtrader.com to fit the custom class stair panels and handrails for her. She’s really pleased that she decided to renovate the stairs and has recommended StairFurb to all of her friends.

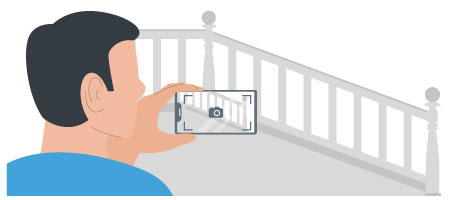
 GET PHOTO ESTIMATE
 BOOK CALL NOW
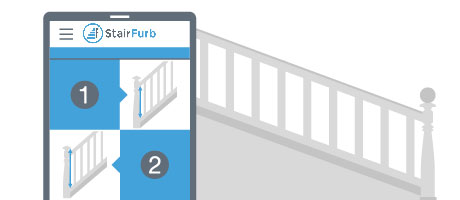
 START DIY QUOTE
 BOOK CALL NOW
 START DIY QUOTE