
Painting your staircase is one of those DIY projects that looks straightforward until you are two hours in, covered in primer, and realising you have painted yourself to the top of the stairs with no way down. A bit of planning goes a long way.
This guide covers everything from prep and paint type to spindle technique and colour ideas, including an honest look at when painting is the right call and when it might be worth considering something more substantial.
Not every staircase is a good candidate for a paint job. The condition of your existing spindles, handrail, and treads will determine whether painting makes sense or whether you are applying a short-term fix to a longer-term problem.
Here is a straightforward way to assess where you stand:
| Condition | What to do |
| Spindles and rails are structurally sound, paint or varnish is intact | A fresh coat is a cost-effective refresh |
| Surface damage, chips, or peeling paint, but the wood is solid | Painting can work with thorough prep |
| Cracked, loose, or structurally compromised spindles; outdated style that paint will not resolve | Replacement is likely the better investment |
If your spindles fall into that third category, it is worth knowing that made-to-measure spindle balustrade kits are designed for DIY installation and do not require specialist tools. StairFurb’s white, grey, and black painted kits arrive factory-finished, which removes the prep and painting process entirely. More on that later in this guide.
One of the most common mistakes when painting stairs is using the same paint across the entire staircase. The treads, the parts you actually walk on, need a hard-wearing floor paint rather than standard wood paint or furniture paint. Floor paint is formulated to cope with scuffs, knocks, and constant foot traffic. Standard wood paint will look fine initially but will chip and scratch within weeks on a tread surface.
The rest of the staircase can be painted with a good quality wood paint. Finish choice matters too.
| Part of the staircase | Paint type | Recommended finish |
| Treads (the part you walk on) | Hard-wearing floor paint | Low-sheen or satin |
| Risers (vertical faces between treads) | Wood paint | Eggshell or satin |
| Spindles / balusters | Wood paint | Eggshell or satin |
| Handrail / banister | Wood paint | Eggshell, satin, or gloss |
| Newel posts | Wood paint | Match handrail finish |
| Stringer (the side panels) | Wood paint | Match overall scheme |
Gloss was once the standard finish for staircase woodwork and still works well on handrails. For spindles, satin or eggshell tends to give a more even result because gloss shows brush marks more readily, particularly on turned or detailed profiles. If you are aiming for a grey staircase finish, satin tends to work well on handrails and newel posts, giving the colour good depth without an overly shiny surface.
Pull up any carpet or runner carefully. Before committing to a paint job, check the condition of the wood beneath. If the treads are heavily worn, cracked, or badly stained, a painted finish may not hold well. Remove tack strips and carpet staples, fill any nail holes with wood filler, and sand flat once dry.
If you are only painting spindles and rails and leaving the treads as they are, protect the carpet or flooring below with dust sheets secured with tape.
Warm soapy water is not sufficient for a staircase. Sugar soap cuts through the grease, wax, and grime that builds up on handrails and spindles over years of use. Apply it directly to the wood, scrub with a cloth or scouring pad, then rinse with clean water and allow everything to dry fully. A flat scouring pad is particularly useful on turned spindles as it can be shaped around the grooves and carved details.
The purpose of sanding is to give the primer and paint a surface to bond to. On spindles and rails in good condition with existing paint or varnish intact, a light pass with 220-grit paper is sufficient. Where paint is peeling or damaged, start with 80-grit to remove the flaking sections, then follow with 120 to 180-grit to smooth the surface.
For treads, 120 to 180-grit works well. An electric sander will save considerable time and effort on larger surfaces. Once sanded, vacuum thoroughly and wipe down with a dry cloth. Any dust left behind will show in the finished coat.
Fill chips, cracks, and nail holes with wood filler. Allow it to dry fully, then sand flush with the surrounding surface. Check each spindle for any structural wobble before you start. A loose spindle needs to be re-secured before painting, not painted over.
Note for publication: Any guidance on building regulation requirements around spindle condition, height, or spacing should be verified against current UK Building Regulations (Part K) before this article goes live.
If you are painting new or bare wood, treat any visible knots with patent knotting solution before applying primer. Without this step, resin can bleed through even multiple coats of paint, leaving yellowish patches in the finished surface.
Apply an all-purpose wood primer to spindles, handrails, newel posts, and any bare wood areas. Use a small detail brush for the top and bottom of each spindle and around any carved or turned sections. Work from the top of the staircase downwards throughout, as primer is thin and will run if applied from the bottom up.
Allow the primer to dry fully before moving to the paint stage. Most primers give a minimum drying time of around one hour, but leaving it closer to 24 hours before applying the first coat of paint will give a better result. Rushing this stage is one of the most common causes of a patchy or peeling finish.
If you are painting StairFurb components from a primed kit: your components arrive primed and ready for the colour coat, so no base primer is needed. A light sand between colour coats is still worthwhile for the smoothest possible finish.
Spindles are the most time-consuming part of a staircase paint job, particularly if they have turned or carved profiles. The prep process is the same regardless of spindle style, but technique matters when it comes to getting an even finish without drips.
Apply decorator’s tape where each spindle meets the handrail above and the base rail below. This protects the adjoining surfaces and gives clean lines. If you are painting the spindles a different colour to the banister, with white spindles against a grey handrail being a common combination, tape the underside of the handrail carefully before you start.
Use a small angled or detail brush for the top and bottom sections of each spindle and a medium brush for the main body. Paint in long strokes following the direction of the wood grain. Do not overload the brush, as too much paint on the bristles leads to drips pooling in carved or turned details, which take longer to correct than they take to create.
The sock method: for turned or heavily detailed spindles, an old sock over a gloved hand is a genuinely useful technique. Cover your hand with a plastic bag first, then pull the sock over the top. Dip the sock lightly in paint and work it around the spindle, getting into the grooves and details. This works best for thin first coats rather than as a substitute for careful brushwork on finishing coats.
Work from the top of the staircase downwards throughout.
Leave 6 to 8 hours between coats. Apply at least two full coats and assess coverage before deciding whether a third is needed, particularly when painting a lighter colour over a darker one. Remove decorator’s tape while the final coat is still wet, as pulling tape off dried paint can lift the finish with it.
Once fully dry, a clear wood topcoat will add protection, particularly on the handrail which takes a lot of handling. A gloss topcoat on spindles and handrails will show fingerprints more readily than a satin finish, which is worth bearing in mind in households with young children.
Treads are high-traffic surfaces and need a different approach to spindles and rails. The main practical challenge is that most households cannot leave the stairs entirely out of use for 24 to 48 hours, so the order in which you work matters.
Paint every other step first, then return to the remaining steps once the first set has dried. Mark the unpainted steps clearly with tape so other household members know which to use. Alternatively, tackle the job over a weekend or paint in the evening so the first set of steps can dry overnight before you return to the rest.
Run tape along the wall edge of each tread and along the line where the tread meets any adjoining carpet or gripper strip. If you are planning a decorative effect such as a painted runner, two-tone risers, or colour-blocked treads, map the design out with tape before you start painting.
Start with the risers, the vertical faces between each tread. Any drips that land on the tread below can be incorporated when you paint the treads themselves. Risers are not walked on, so standard wood paint is appropriate here and floor paint is not required on the risers.
Use a brush to cut in along the edges of each tread, then fill the main surface with a small roller or a large brush. Apply at least two coats, following the recommended drying time on the tin between each. For households with elderly residents or young children on smooth painted stairs, a fine grit anti-slip additive can be mixed into the floor paint on treads.
Note for publication: Verify anti-slip additive compatibility with the floor paint being used before specifying any products.
Most floor paints need at least 24 hours before light foot traffic, and full curing typically takes several days. A socks-only rule for the first 72 hours is a practical way to avoid scuffing the surface before it has reached full hardness.
Staircase spraying uses an HVLP or airless spray gun rather than a brush and can produce a noticeably smooth finish on spindles and handrails, particularly on turned profiles where brush marks are difficult to avoid completely.
The trade-off is in the preparation required. Spraying requires extensive masking of floors, walls, carpets, and windows, and overspray can travel further than expected in a hallway or landing. For most homeowners painting their own staircase, brush application is more practical and produces a perfectly good result with proper preparation. Staircase spraying tends to be better suited to professional decorators or to homeowners who have used spray equipment before.
StairFurb’s pre-painted kits are factory-finished under controlled conditions, which is why the colour consistency and surface quality across a full kit is difficult to replicate with a brush on site.
Grey has become one of the most popular staircase paint colours in the UK. It works well alongside the neutral wall tones that dominate current hallway interiors and suits a wide range of property styles, from Victorian terraces to new-build homes. A satin grey on the handrail and newel posts, paired with white spindles, is one of the cleaner combinations and one of the most searched for.
For a stronger look, grey staircase paint applied to both rails and spindles works well against a white or off-white hallway wall. The contrast gives the staircase definition without making the space feel dark or enclosed.
Black banisters have grown considerably in popularity alongside the broader trend for monochrome hallway interiors. A black handrail and newel posts against white spindles and light treads is a particularly clean combination. It also works well in properties with period features, where a gloss or satin black finish echoes the original character of the woodwork.
A two-tone staircase, with contrasting risers and treads or different colours on the spindles and handrail, takes more planning but can make the staircase a genuine focal point of the hallway. Painter’s tape is essential for clean lines. A painted runner effect, achieved by applying a central stripe of colour to each tread and leaving a border in a contrasting tone, is a popular approach for adding interest without committing to a fully painted stair.
For homeowners who want a specific grey, white, or black staircase finish but would rather avoid the prep and painting process, StairFurb’s pre-painted white, grey, and black balustrade kits arrive factory-finished and ready to install. Each kit is made to the measurements of your staircase, so the components fit without any cutting or adjustment on site.
Many homeowners start by painting their spindles and then realise that the spindle style itself looks dated even with a fresh coat. This is particularly common with heavily turned pine spindles in properties built in the 1980s and 1990s, where the profile of the spindle reads as a period feature regardless of colour.
In this situation, replacement is worth considering. Spindle balustrade kits allow you to keep existing newel posts and handrails if they are structurally sound, and replace just the spindles and base rail for a fully updated look.
Glass balustrade kits are another option, particularly for homeowners who want to open up the staircase visually and make a hallway feel larger and brighter. There is no painting involved on the glass panels themselves, and the frames and rails can be supplied in your preferred finish.For a broader view of what is available, the full range of stair refurbishment kits covers everything from spindle replacement to glass balustrade systems, all made to measure in the UK.
Treads require a hard-wearing floor paint rather than standard wood paint. Floor paint is formulated to cope with constant foot traffic without chipping or scuffing, whereas standard wood paint or furniture paint will deteriorate quickly on a tread surface. Risers, spindles, and handrails can all be painted with a good quality wood paint in eggshell or satin finish.
You can, but the result is unlikely to last. Sanding creates a key on the surface so primer and paint can bond properly. Without it, the new coat is likely to peel or flake, particularly on handrails and the tops and bottoms of spindles where there is a lot of handling. A light sand with fine-grit paper adds very little time to the overall job and makes a meaningful difference to the longevity of the finish.
Allow at least two to three days in total: sanding, cleaning, and priming on the first day; the first coat of paint on the second; finishing coats on the third. Most of that time is drying time rather than active work. Rushing the drying stage between coats is the most common cause of a patchy or peeling finish.
Yes. Primer seals the wood, prevents the paint from soaking in unevenly, and gives the topcoat a surface to bond to. Without primer, covering bare wood or painting a light colour over a dark one will require significantly more coats, and the finish is more likely to be uneven.
Work from top to bottom throughout so any drips fall onto unpainted surfaces. Apply decorator’s tape where each spindle meets the handrail and base rail before you start. Keep a clean cloth nearby to catch drips immediately rather than letting them dry. A small angled detail brush gives much better control on the top and bottom sections of each spindle than a standard flat brush.
White spindles remain the most common choice in UK homes and work across almost any hallway colour scheme. Grey painted banisters have grown considerably in popularity in recent years, typically in satin finish on the handrail and newel posts paired with white spindles. Black is also increasingly used, particularly in homes with a monochrome hallway scheme.
If the spindles are structurally sound and simply look tired in colour, painting is a practical and cost-effective option. If they are loose, cracked, or the profile feels too dated to be resolved with paint, replacement spindle kits designed for DIY installation are worth comparing on price and effort. Modern kits arrive pre-cut and pre-drilled, removing most of the technical work involved.
Staircase spraying uses a spray gun to apply paint rather than a brush, producing a very smooth, brush-mark-free finish. It works particularly well on turned spindles where brush marks are difficult to avoid. The main drawback is the preparation involved, as thorough masking of floors, walls, and windows is necessary to control overspray. For most DIY homeowners, careful brushwork with the right tools produces a good result without the additional preparation.


Ready to transform your staircase? Get a free, no-obligation quote today.

Bespoke staircase refurbishment kits, handcrafted in the UK. DIY-friendly with expert support at every step.

Share pictures of your staircase and we'll provide a quote, plus offer expert help with measurements with a video call.
Grab your tape measure and follow our step-by-step video tutorials to get your quote
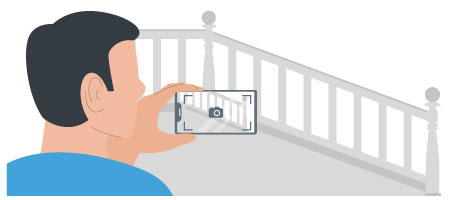
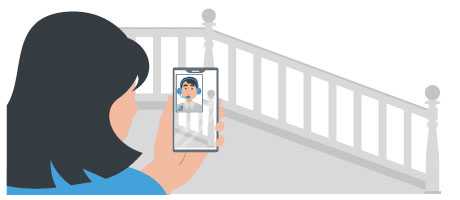
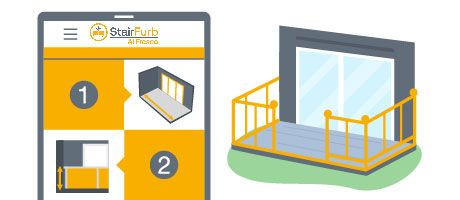
Simply take a photo of each balustrade section and let us know which style you want. We’ll then estimate your dimensions and provide an idea of price.
 GET PHOTO ESTIMATE
Get help measuring and a free no-obligation quote on a free 20-minute video call from the comfort of your own home. Speak with our expert team about your staircase upgrade.
 BOOK CALL NOW
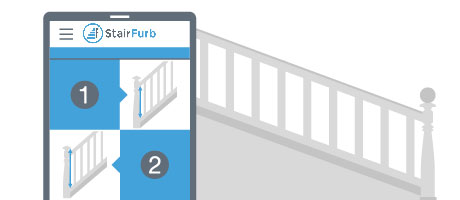
Measure your staircase using our online video tutorials and input them into our online configurator for a free, no-obligation quote. It takes less than 15 minutes.
 START DIY QUOTE

Get help measuring and a free no-obligation quote on a free 20-minute video call from the comfort of your own home. Speak with our expert team about your staircase upgrade.
 BOOK CALL NOW
Measure your staircase using our online video tutorials and input them into our online configurator for a free, no-obligation quote. It takes less than 15 minutes.
 START DIY QUOTE
We've received your form and will be in touch shortly. To make sure we connect you with the right person, please keep an eye on your WhatsApp messages. We'll send you a quick message there that you'll need to respond to.
Please try again or contact us directly.
