Installation
Whether you’re a DIY customer, or not, installation isn’t something you need to worry about.

DIY Installation
StairFurb offers custom-made glass balustrade kits designed for easy DIY installation. We handle all the complex preparation in our factory, so you can enjoy a seamless and satisfying home improvement project.

Local Installation Service
DIY installation not for you? No problem, we can help put you in contact with third party, local fitters. Enter your postcode to find local fitters experienced in StairFurb installation works.

All of StairFurb’s Glass Balustrade Kits are designed and manufactured with DIY in mind.
Everything is cut to the required lengths and angles, with holes pre-drilled and fixing screws provided. All you need to do is cut and remove your existing balustrade, then fit our modular kit following our simple video guides.
To fit our balustrade kits you will need a hand drill, screwdriver, allen keys, saw and hammer. There are fixing kits available in our parts shop.
All kits are bespoke made, so the handrail and baserails are not only pre-cut to the required length and angle, but they also have any holes pre-drilled and clamps pre-fitted. This makes fitting easy in just a few steps:
- Remove the existing balustrade. This generally just requires a hand saw and a hammer or mini crowbar.
- Screw down baserail using the supplied screws, through the pre-drilled holes screw the glass clamps to the baserail. The screws should go all the way through the baserail and fix it in place.
- Fit handrail. Using the pre-supplied screws, fit the handrail to the newel posts. In the paperwork supplied with your order, you will see how hight to fit the handrail.
- Fix the Glass. Place the glass into the clamps and tighten the clamps to secure the glass in place.
All kits are bespoke made, so the handrail and baserails are not only pre-cut to the required length and angle, but they also have any holes pre-drilled and clamps pre-fitted. This makes fitting easy in just a few steps:
- Remove the existing balustrade. This generally just requires a hand saw and a hammer or mini crowbar.
- Screw down baserail using the supplied screws, through the pre-drilled holes screw baserail in position.
- Insert Glass. Place the glass into the baserail, inserting the supplied glass spacers between each panel.
- Fix Handrail. The handrail should be placed on top the glass and screwed into the newel posts at each end.
All kits are bespoke made, so the handrail and baserails are not only pre-cut to the required length and angle, but they also have any holes pre-drilled and clamps pre-fitted. This makes fitting easy in just a few steps:
- Remove the existing balustrade. This generally just requires a hand saw and a hammer or mini crowbar.
- Screw down baserail using the supplied screws, through the pre-drilled holes screw baserail in position.
- Insert Spindles. Place the spindles into the baserail, in the pre-drilled holes.
- Fix Handrail. The handrail should be placed on top the spindles and screwed into the newel posts at each end.
Newel posts can be a little more complex to install, with the fitting method depending upon the setup of your existing posts and the style of post you choose. We would generally advise seeking the advise of a professional when installing newel posts.
For customers that don’t want to install our kits themselves, we’ve got local fitting solutions across most of the UK. Use our Find Your Fitter function to see the installation available for your location.
We’ve partnered with lots of our previous customers to offer you the chance to see what we offer in their own homes! Visit our Brand Ambassador page to see who’s near you. You can filter by balustrade style to find this particular look.
Real Customer Stories
Explore inspiring video case studies featuring our customers’ transformations with Stairfurb’s glass balustrades. See the impact firsthand and gain insights for your own staircase project


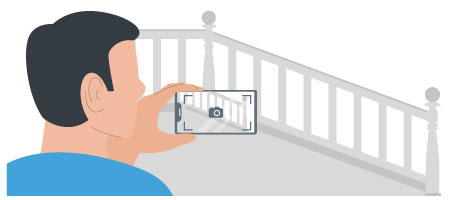
 GET PHOTO ESTIMATE
 BOOK CALL NOW
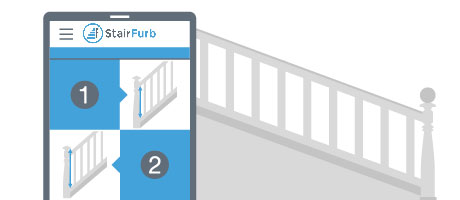
 START DIY QUOTE
 BOOK CALL NOW
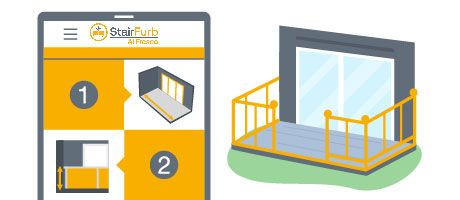
 START DIY QUOTE