

A wooden staircase is one of the hardest-working surfaces in any home. It takes foot traffic every day, picks up grit carried in from outside, and sits in the path of spills, sunlight, and general wear. Left unprotected, the timber slowly loses the finish that keeps it looking good, and once bare wood is exposed the damage tends to set in for good.
Protecting a wood staircase is not complicated, and for most homes it is a job a capable person can do themselves. This guide covers why timber stairs need protection, how to choose the right finish, how to apply it step by step, and the everyday habits that keep the result looking good for years. It also explains when a coat of oil is all you need, and when a worn or dated staircase is better refurbished.
Wood is a porous material. When the protective finish on a staircase wears thin, the timber underneath starts to absorb moisture from spills, damp shoes, and cleaning. That leads to water marks, raised grain, and dark patches that no amount of cleaning will remove.
Bare or under-protected treads also scratch and dent far more easily. A small scuff on a sealed surface wipes away, but the same knock on unprotected wood leaves a mark that reaches the fibres. Over time these add up, and the only fix becomes sanding the whole staircase back and starting again.
There is a cost argument too. Refinishing a full staircase professionally runs into several hundred pounds, and a tradesman quote for fitted work sits higher still. Keeping the finish topped up is a small amount of effort that pushes that expense years down the line, or removes it altogether.
The right way to protect a wooden staircase depends on what you are working with. Two quick checks tell you almost everything you need before you buy any product.
First, work out whether the timber is a hardwood or a softwood. Oak and other hardwoods are dense and resist wear well, but they still need sealing to keep moisture out. Pine and other softwoods are more open-grained, dent more easily, and soak up finishes faster, so the choice of product matters more.
Second, check whether the stairs already have a finish, and if so, what kind. This decides whether you can simply add a fresh coat or whether the old finish needs removing first.
Matching your new product to the existing finish saves work. Oil can usually be refreshed over old oil with a light sand. A film finish like varnish generally needs keying or stripping before anything new will bond properly.
This is the decision that matters most. The finish you pick sets how the stairs look, how well they cope with daily use, and how easy they are to touch up later. The four common options each suit a different priority.
| Finish | The look it gives | How it copes with heavy use | Ease of DIY application | Ease of repair or touch-up |
| Hard wax oil | Low sheen, keeps a natural feel | Good all-rounder for household stairs | Straightforward, brush or cloth | Good, blends in with a light sand |
| Penetrating wood oil | Matt, brings out the grain | Softer surface, wears at contact points | Easy, wipe on and off | Very easy, spot-sand and re-oil |
| Water-based polyurethane varnish | Clear, from matt to gloss | Hard-wearing surface film | Needs care, dries fast | Harder to patch without a visible edge |
| Wax | Soft, traditional lustre | Light protection only, not for busy stairs | Easy | Easy but needs frequent redoing |
For most family staircases, a hard wax oil is the sensible middle ground. It gives a hard-wearing surface that still repairs neatly, which matters on a staircase because wear always shows first on the same few treads and the handrail.
If you want the toughest possible surface and do not mind that repairs are trickier, a water-based polyurethane varnish for stairs is the hardest-wearing option. If you value easy upkeep over outright surface strength, a penetrating oil is the simplest finish to live with, because you can re-oil a worn tread without redoing the whole flight.
It is worth clearing up a common point of confusion. A wood stain for stairs changes the colour of the timber, but most stains offer little or no protection on their own. If you stain your stairs, you still need a protective top coat of oil or varnish over the top once the colour has dried. Skipping that step leaves the wood exposed.
Applying or refreshing a protective finish is well within reach for a confident DIY beginner. Two people are not needed, the tools are basic, and most staircases can be done over a weekend once drying time is allowed for. The steps below apply whether you are sealing bare oak for the first time or refreshing a tired finish.
Tip: Keep the stairs usable while you work. You do not have to lose the staircase for a whole weekend. Finishing alternate steps, or doing one half of each tread at a time, lets the household keep using the stairs safely while the other sections dry. It takes a little longer but is far more practical in a busy home.

The finish does the heavy lifting, but a few small habits make it last much longer.
A wooden staircase is more than its steps. The balustrade takes its own share of wear, and it needs the same care as the treads.
If you are working with untreated oak parts, sealing or oiling them protects the wood and lets you match the colour to the rest of your staircase. StairFurb supplies solid oak spindles and rails untreated for exactly this reason, along with an oak oil to finish them, so you can seal them to suit your existing woodwork.
There is an honest limit to protection, though. Once a balustrade component is worn past the point a fresh finish can help, or the style itself looks dated, refinishing it over and over is a false economy. That is the point at which replacing the balustrade makes more sense than preserving it. StairFurb’s made-to-measure balustrade refurbishment kits are manufactured in the UK and designed for DIY installation with support at every step, which makes swapping a tired balustrade a realistic weekend project rather than a full rebuild.
When thinking about whether you should refurbish or replace your stairs, it really comes down to one of four answers. Here’s a quick way to work out which option is best for you.
| Your situation | The sensible route |
| Finish is sound but starting to thin | Re-coat with your existing finish type |
| Finish is worn through or damaged in places | Sand back and refinish |
| Structure is sound but the balustrade is dated or damaged | Refurbish with a made-to-measure kit |
| The staircase structure itself is unsound | Replace the staircase |
The savings grow the further up that list you can stay. A tin of oil and an afternoon protects a staircase that is already in good shape. A refurbishment kit updates a sound staircase for a fraction of a full replacement, which typically runs into several thousand pounds through a tradesman. Replacing the whole structure is the last resort, not the starting point.
A hard wax oil suits most busy staircases because it gives a hard-wearing surface that still repairs neatly. If you want the toughest surface film and do not mind trickier repairs, a water-based polyurethane varnish is the hardest-wearing choice. Avoid plain wax on stairs that see heavy use, as it offers only light protection.
Yes, in almost all cases. Bare wood needs a light sand to open the grain so the finish can bond, and a worn finish needs sanding back to give a sound, even surface. Skipping this step is the most common reason a new finish fails to hold.
Staining changes the colour of the wood, while sealing protects it. Most stains do not protect the timber on their own, so you still need a coat of oil or varnish over the top once the stain has dried.
It depends on traffic and the finish used, but a good habit is to re-coat before the finish wears through rather than after. Handrails and the busiest treads usually need attention first. Checking once a year and topping up as needed is a sensible routine.
Yes. A clear oil, a matt varnish, or a natural-finish hard wax oil all protect the wood while keeping its existing colour. If you want to keep the rawest possible look, choose a product designed to leave a natural appearance.
Bare and freshly finished timber can be slippery, especially in socks. A stair runner or non-slip treads add grip on the steps that need it most, and clear anti-slip finishes are available where you want to keep the wood visible. Any staircase should also have a secure handrail. If slip resistance is a real concern for your household, it is worth getting advice suited to your specific stairs.
Wooden stairs work well in family homes as long as they are properly protected and the balustrade is safe. A sealed finish copes with the knocks of daily life, and a sound balustrade that meets UK spacing requirements keeps young children safe. For families who want an open feel with a surface that is easy to keep clean, a glass or spindle balustrade is worth considering alongside the timber.
Protecting a staircase yourself costs little more than a tin of finish and your time. Refinishing professionally runs into several hundred pounds, and replacing a full staircase through a tradesman typically costs several thousand. Keeping the finish maintained is what keeps you at the lower end of that range for as long as possible.



Share pictures of your staircase and we'll provide a quote, plus offer expert help with measurements with a video call.
Grab your tape measure and follow our step-by-step video tutorials to get your quote

Get help measuring and a free no-obligation quote on a free 20-minute video call from the comfort of your own home. Speak with our expert team about your staircase upgrade.
 BOOK CALL NOW

Measure your staircase using our online video tutorials and input them into our online configurator for a free, no-obligation quote. It takes less than 15 minutes.
 START DIY QUOTE

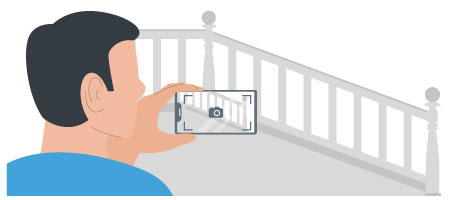
 GET PHOTO ESTIMATE
 BOOK CALL NOW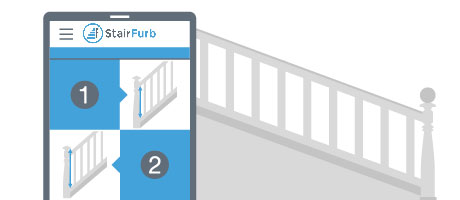
 START DIY QUOTE