
Installing a handrail on your stairs is one of those home improvement jobs that looks more involved than it is. With the right preparation, most competent DIYers can fit a wall-mounted stair handrail in a morning or afternoon using basic tools.
This guide walks through the full process, from measuring up to testing the finished rail. It also covers the regulations you need to know, what the job typically costs, and the mistakes that are worth avoiding before you start drilling.
This guide is useful whether you are fitting a simple wall-mounted rail, replacing an existing one, or considering a full balustrade kit upgrade. Where a StairFurb kit simplifies a particular step, that is noted, but the process applies regardless of where you source your components.
Handrails are a legal requirement on UK domestic staircases under Approved Document K (Protection from Falling, Collision and Impact). Before buying any materials or picking up a drill, it is worth knowing what compliance looks like for a standard home installation.
| Requirement | Detail |
| Handrail height | 900mm to 1000mm, measured from the pitch line to the top of the handrail |
| Pitch line | The diagonal line connecting the nosing of each tread |
| Stairs under 1m wide | Handrail required on one side |
| Stairs over 1m wide | Handrail required on both sides |
| Bottom two steps | No handrail required |
| 100mm sphere rule | No gap in the balustrade should allow a 100mm sphere to pass through |
| Wall clearance | Handrail should sit 50–75mm from the wall surface to allow a full grip |
These rules apply to new installations and replacements alike. Getting the height wrong creates a compliance issue and makes the rail uncomfortable and less safe to use.
Tip: If you are using a StairFurb oak stair handrail kit, the components arrive pre-cut and pre-drilled. Check what is included in your kit before buying extras, as you may need fewer materials than you expect.
Measure the full length of the staircase along the pitch, not the horizontal run. These two measurements are different, and using the wrong one means your handrail will be short.
Mark the correct handrail height at the top and bottom of the staircase. Measure 900–1000mm vertically from the pitch line at each point and make a clear pencil mark on the wall.
Handrails are commonly sold in standard lengths: 1.8m, 2.4m, 3.6m, and 4.2m. Measure before ordering. If you need to join two lengths, plan where the join falls, as it should land over a bracket rather than between two fixings.

Run a string line or chalk line between your top and bottom height marks. This gives you the straight line the handrail will follow.
Mark bracket positions along this line. Place one at the top, one at the bottom, and one every 900mm to 1m between them. No bracket should be more than 1m from the next. A standard staircase will typically need four brackets.Important: On plasterboard walls, brackets must fix into studs or use rated metal plasterboard anchors. Raw plugs alone are not adequate for a load-bearing handrail.

Use a stud finder to locate studs along your marked line. If your planned bracket positions do not land on a stud, adjust the spacing slightly to align them. A small shift in bracket spacing is far preferable to an insecure fixing.
Mark each stud centre clearly with tape before drilling.

Use a bradawl to mark the screw hole positions for each bracket. Drill pilot holes at each mark, angling them slightly toward the stud for a stronger bite.
Insert appropriate wall plugs for solid masonry walls, or rated metal anchors for plasterboard. Fix each bracket firmly, as there should be no movement at all once it is in. Use a spirit level to confirm each bracket follows the string line as you work up the staircase.

If cutting your handrail to length, sand the cut ends smooth once done. If you are painting or staining the rail, do it before fixing to the brackets. Working around brackets in situ is harder and produces a worse result.
Drill shallow pilot holes on the underside of the rail at each bracket position before you mount it. This prevents the timber splitting when you drive the fixing screws.

Position the handrail on the brackets and check the height at several points along the run. Once you are satisfied it is sitting correctly, screw up through each bracket into the underside of the rail.
A small amount of grab adhesive at each bracket contact point adds rigidity and is worth doing. If you are joining two lengths, fix the join over a bracket with both ends screwed down. Fill the joint with wood filler, allow it to dry, then sand it flush before finishing.

Apply firm downward pressure at several points along the rail, then push laterally. There should be no flex or movement anywhere along the run.
Run your hand along the full length to check for snags, rough spots, or any screw heads sitting proud. Sand and touch up the finish before considering the job complete.

The handrail is one of several key staircase parts that must follow the pitch of your staircase. If the angle is wrong, the rail height will be inconsistent from top to bottom and the installation will not be compliant.
Measure your stair pitch using a digital angle finder or bevel gauge placed on the tread surface. Typical domestic stair pitches fall between 30° and 42°.
Most wall-mounted handrail brackets are adjustable across a range of angles. Check this specification before purchasing, because a bracket that does not cover your stair pitch will not work, regardless of how well it is fitted.
If you are ordering a made-to-measure kit, the components are produced to match your specified staircase. This removes the guesswork from angle matching and is one of the practical reasons many homeowners choose a kit over sourcing individual parts.
This is the most common cause of a wobbly or failed handrail. Raw wall plugs are not adequate in plasterboard. Use rated metal anchors or fix directly into studs. If you are unsure of your wall construction, check before drilling.
The 900–1000mm height requirement is measured from the pitch line, not from the flat surface of the tread. Measuring from the tread produces a higher result, which brings the rail out of compliance.
Brackets placed more than 1m apart allow the handrail to flex under load. Add an intermediate bracket rather than stretching the spacing to save time or money.
Driving screws directly into a handrail without pilot holes, particularly near the ends of the timber, splits the wood. Pre-drilling takes a few minutes and avoids a frustrating problem mid-job.
Applying finish to a rail that is already fixed to the wall is awkward and produces an uneven result. Paint or stain the rail before installation wherever possible, then touch up any marks left during fitting.
The rail needs to resist a firm downward pull. Testing it before walking away from the job is a straightforward step that is easy to skip and easy to regret.
Buying handrail brackets before measuring your stair angle can result in incompatible components. Confirm the pitch before placing any order.
The cost of a handrail installation depends on the type of rail, the material, and whether you are doing the work yourself or hiring a carpenter.
| Type | Approx. materials cost | Notes |
| Timber wall-mounted rail (mopstick or pig’s ear) | £65–£175 for the rail | Brackets add approx. £5–£20 each |
| Full timber wall rail with brackets and fixings | £100–£300 total | Dependent on length and material |
| Oak stair handrail kit (with spindles and base rail) | £400+ | A more substantial upgrade than a standalone wall rail |
| Labour (carpenter or joiner) | £150–£600 total | Varies by location and complexity |
A simple wall-mounted handrail is well within the DIY budget. A full balustrade kit costs more and involves a more involved installation, but the finished result is significantly different from a wall-mounted rail.
A wall-mounted handrail is a manageable project for anyone comfortable using a drill and spirit level. The risks are limited to incorrect fixings and getting the height wrong, both of which are easy to avoid with the preparation covered in this guide.
Hiring a professional is worth considering if your staircase has multiple turns or landings, if the wall construction is unknown, or if you are installing a full balustrade system rather than a simple wall rail. A carpenter or joiner with experience in stair fitting will also know how to handle older properties where walls may not be straightforward.
StairFurb’s Find a Fitter service connects customers with vetted local tradespeople who have experience fitting StairFurb kits. If you want the product but prefer to have it installed professionally, this is a straightforward route that removes the need to source a fitter independently.
A wall-mounted handrail is a practical solution for enclosed staircases. For open staircases, or where the existing balustrade is dated or failing, a full kit upgrade produces a much more complete result.
StairFurb supplies made-to-measure balustrade kits in oak, glass, and steel spindle configurations, manufactured in the UK and delivered with all components pre-cut and ready to fit. The kits come with step-by-step video guides and full installation instructions.
If you are not sure which route is right for your staircase, a free video consultation takes around 15 minutes and gives you a tailored price with no obligation.
Get a price for your staircase →


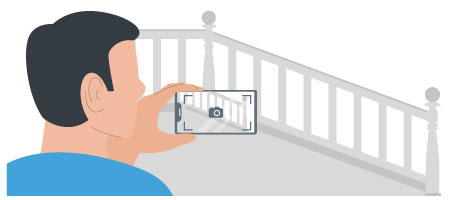
Share pictures of your staircase and we'll provide a quote, plus offer expert help with measurements with a video call.
Grab your tape measure and follow our step-by-step video tutorials to get your quote

Get help measuring and a free no-obligation quote on a free 20-minute video call from the comfort of your own home. Speak with our expert team about your staircase upgrade.
 BOOK CALL NOW
Measure your staircase using our online video tutorials and input them into our online configurator for a free, no-obligation quote. It takes less than 15 minutes.
 START DIY QUOTE
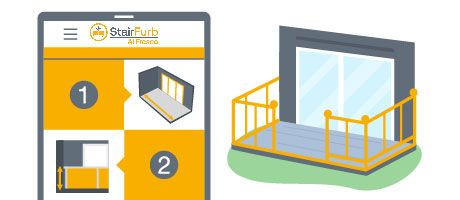
 GET PHOTO ESTIMATE
 BOOK CALL NOW
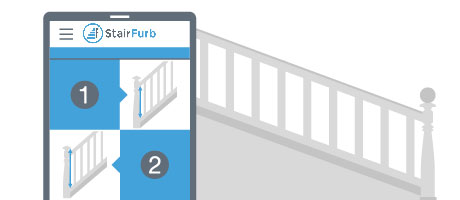
 START DIY QUOTE